Cursor AI Tutorial and Workflow Optimization: A Comprehensive Guide
Introduction
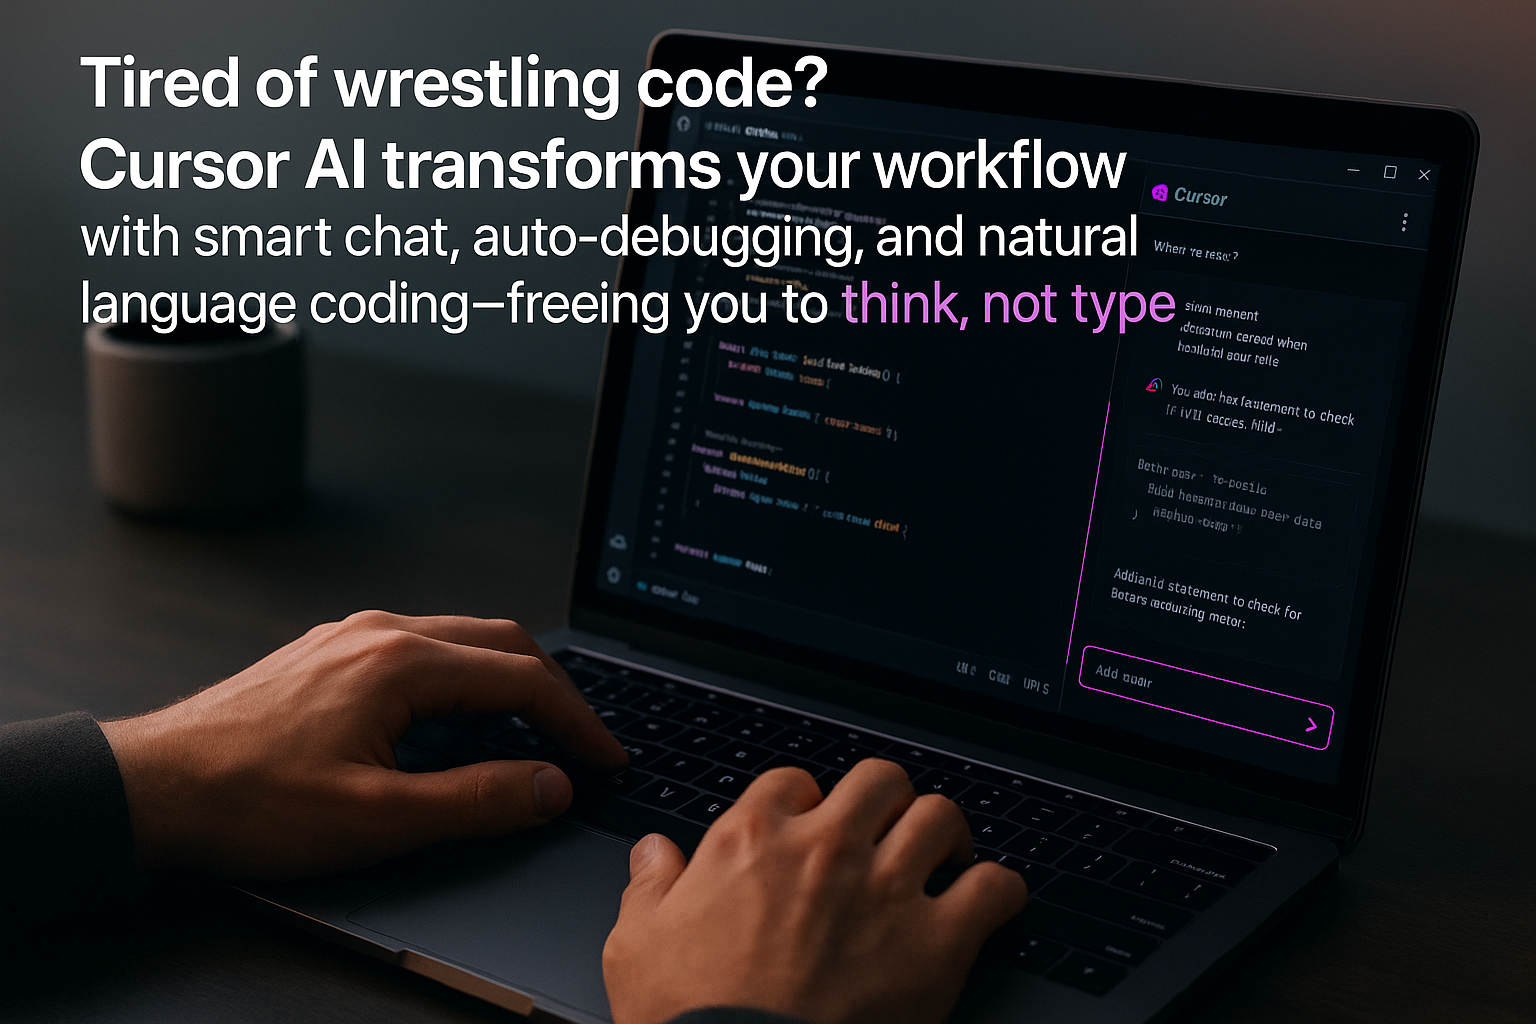
You know those days when writing code feels more like wrestling an octopus than crafting software? That’s where AI-assisted coding swoops in and steals the show. Cursor AI, an AI-powered code editor, is shifting this balance for developers everywhere. Picture a VS Code-style interface, but on digital steroids, with code generation, intelligent chat, and auto-debugging baked right in.
Here’s what we’ll cover in this guide: practical techniques for working with Cursor AI, a stack of time-saving shortcuts, smart workflows, and a clear-eyed comparison with other AI programming tools like GitHub Copilot. Whether you’re new to AI code editors or looking to up your game, pull up a chair.
1. What Is Cursor AI and What Can It Do?
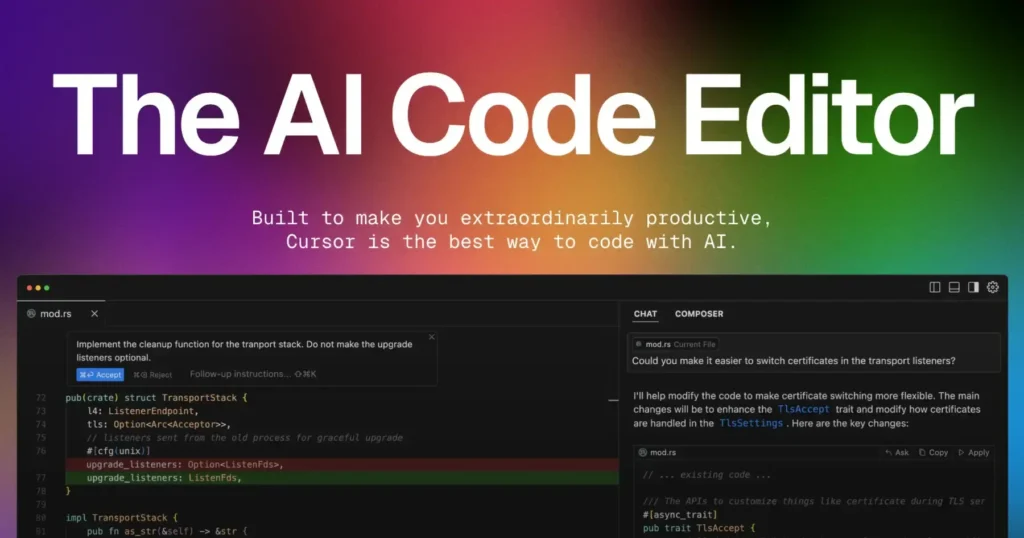
Let’s lay the groundwork. Cursor AI is an AI code editor built atop Visual Studio Code. It combines the extensibility and ergonomics of VS Code with the brawn of OpenAI’s GPT and Anthropic’s Claude models, meaning it can write, debug, and refactor code using natural language. The vision? Developers do less typing and more thinking.
What sets it apart?
- AI code generation from plain English prompts (or any natural language style you like).
- Cursor auto run mode for letting AI auto-execute tests, build commands, or fix lints, no manual fiddling.
- Full chat features for codebase queries, explanations, and even design suggestions.
- Autocomplete and tab-based navigation that feels downright psychic once you get the rhythm.
- Supports all major programming languages, and treats extension support almost identically to classic VS Code.
If you’re coming from traditional code editors, Cursor’s natural language workflow and integration mean you’ll stop feeling like a QA tester and more like a systems architect guiding a capable assistant. You’re still in charge, but the heavy lifting is handled.
2. Installing Cursor AI: Step-by-Step Instructions
All right, onto the nuts and bolts. Getting started with Cursor AI is straightforward, whether you’re on Windows, macOS, or Linux. Here’s the rundown:
- Windows/Mac: Download the installer directly from Cursor’s website. Run the installer just as you would for any regular app.
- Linux: Grab the AppImage. Before running, make it executable with:
chmod a+x cursor-0.40.3x86_64.AppImage./cursor-0.40.3x86_64.AppImage
Versions may update, double-check what you’ve downloaded.
First boot will ask you:
- Preferred keyboard shortcuts (VS Code defaults make transition painless).
- Language for interacting with AI.
- Codebase-wide context (so AI understands your whole project, not just one file).
- Terminal integration, super handy for opening Cursor from the shell.
Don’t forget: you can attach your own API keys for custom models under Models in settings. If you’re jumping over from VS Code, most settings and extensions transfer over, keeping the learning curve gentle.
3. Key Features and Everyday Use Cases
AI Code Generation and Autocompletion
Cursor’s code generation makes your keyboard feel almost optional. Hit Command K (or Ctrl K) to open the inline generator and write what you want: “Create a debounce function for React,” or “Write a SQL query to fetch active users.” The AI spits out code right where you want it.
Messy multi-line completions? It handles those gracefully, and you can describe the change in plain language: “Make all fonts smaller except the main header,” for example. The genius part? It rewrites diff-style, so you can check what’s changing before applying anything.
Auto Run Mode Explained
One of Cursor’s most unsung heroes is auto run mode. Don’t let the name spook you, this lets the agent automatically run builds, tests, or lints and keep editing until things pass.
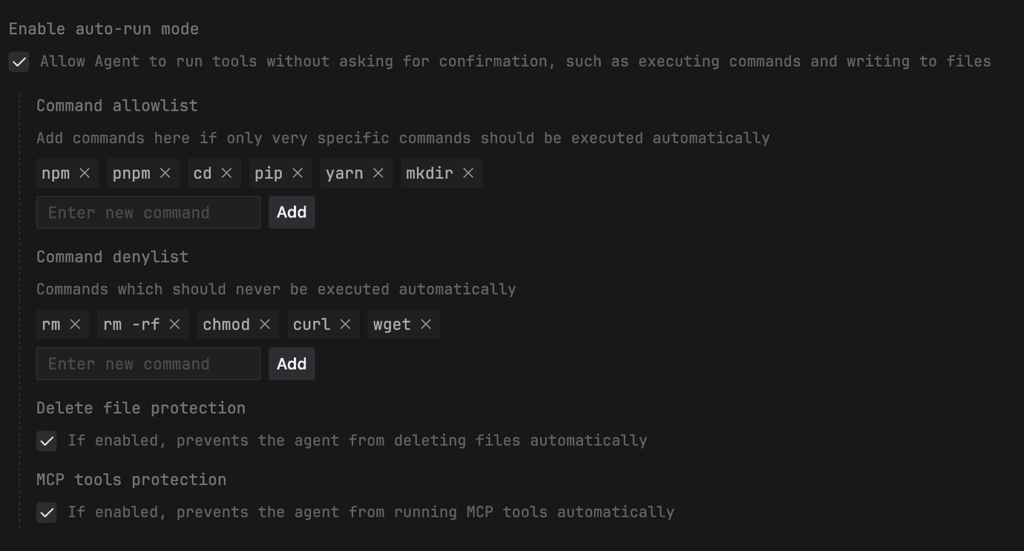
How do you enable it? Head to Features → Cursor Settings and toggle auto run mode on. You can get granular: supply allow lists (“vitest, npm test, nr test, tsc…”) or things to block. No need to micromanage build and test cycles, the AI will iterate until code checks out.
Chat Features and Enhanced Codebase Understanding
Need more in-depth help? Select code and hit Command I (or Ctrl I) to start a chat with the agent, focused on that snippet. The Cursor chat features go deep: ask for summaries, explanations, “find where this function is used,” or even paste in error logs and ask for fixes.
The cherry on top? Use @-mentions to reference files, folders, documentation, or even initiate a web search. You can ask, “@Web what’s the latest stable Python version?” and get internet-sourced answers right in the chat.
4. Practical Workflow Examples and Productivity Tips
Using Cursor AI to Fix Build and TypeScript Errors
Long gone are the days of poring over TypeScript errors like a detective. Here’s what I do: type “Run nr build to see errors, fix them, and rerun until clean.” Cursor will chug through lint, build, and formatting complaints, and fix them too.
For big projects, I keep a “pre-PR” command handy (just the quick CI checks: tsc, Prettier, ESLint). Let Cursor handle it and focus your brainpower where it counts.
Test-Driven AI Coding
Honestly, traditional test-driven development can be a slog. But with AI? Game changer. I’ll prompt Cursor, “Write tests first, then the code, run the tests, and keep fixing until it passes.” This turns tedious back-and-forth into an automated process. Cursor will create test files, write code, spot misses, and try again, all while you monitor progress from your coffee mug.
Building robust test suites is less of a chore: paste failing case logs into chat, tell the AI to update the suite and code, and watch it grind away until green.
Debugging Complex Issues
Some bugs love to hide. Here’s my move: tell Cursor, “Add logs at key points so we can see what’s happening.” Run the code, feed the logs back into the chat, and ask, “Given these logs, how should we fix this?” Cursor becomes your debugging partner, like a junior dev who works tirelessly, iterating on log-based insights until the problem gives in.
UI Design Workflows
Let’s not kid ourselves: AI code editors struggle with pixel-perfect design. If someone asks, “Can Cursor make this design look right?”, well, not entirely. Instead, try this combo:
- Design in Figma
- Export with Builder.io’s Figma plugin
- Iterate the code with Cursor
You get the structure right, then let the AI refactor or optimize. This hack gives a near-guarantee for design-to-code, while sidestepping AI’s weakest spot.
Command K and Command I Shortcuts
Should you use Command K or Command I? My workflow is: fast, local edits (especially on small bits of code) = Command K. Larger, more context-rich tasks = Command I for full agent chat. Bonus: in the terminal, Command K can be your Swiss-army knife, handling git commands (“list last five branches”) without breaking a sweat.
Shortcut tip: don’t stress if you forget some. Cursor’s command palette (Command Shift P) surfaces everything.
Autocomplete and Tab Navigation Tips
Autocomplete works, but Cursor adds a twist. The “tab again” nuance can be confusing at first. Sometimes it completes the code, sometimes it jumps to the next suggestion. A little practice and you’ll get the rhythm, just pace yourself and don’t be afraid to try hitting tab twice if you find yourself stuck in a suggestion loop.
5. Advanced Features and Customization
Custom AI Behavior and Rules
You can nudge Cursor to always use certain styles (like, “always add type hints to Python functions”). Head to general settings, add your rule, and the AI will remember, no need to micromanage each prompt.
If you’re using private or niche libraries, add documentation references in chat. Just type @Docs and provide a URL or copy. The AI can now cite or pull from it for more accurate, context-aware code.
Integration with Git Repositories
Bring more muscle to your version control. Cursor lets you:
- Add a GitHub repo context to chat
- Generate commit messages (just hit the magic wand in the source control tab, simple, if not always poetic)
- Manage your code diffs right inside the editor
A heads-up: always be conscious of private repo access if you’re working with proprietary code.
Bug Finder and Code Quality Tools
Don’t overlook the bug finder (Command Shift P then “bug finder”). Cursor compares your changes to the main branch to spot new bugs. It isn’t magic, but it will catch zero-value errors or other sneaky issues, especially useful when working on UI or complex data pipelines. Think of it as a second set of eyes.
6. Cursor AI vs GitHub Copilot: A Detailed Comparison
So which tool is right for you? Let’s break down Cursor AI vs GitHub Copilot:
| Category | Cursor AI | GitHub Copilot |
|---|---|---|
| Integration | Cursor is its own VS Code-based editor. | Copilot works as a plugin in traditional IDEs (VS Code, JetBrains, etc.). |
| Codebase Context | Cursor can scope to your whole project, building broad contextual understanding. | Copilot focuses on the file currently open or recently edited. |
| Customization | Cursor supports custom AI models, documentation, and rules. | Copilot is mostly plug-and-play. |
| Workflow | Cursor agents automate builds, lints, and more—better for iteration-heavy tasks. | Copilot is great for fast autocomplete and code snippets. |
| Who benefits most? | Cursor leans toward senior engineers juggling multiple files, heavy refactoring, and contextual debugging. | Copilot shines for generalists or as a drop-in for any IDE. |
Bottom line: if your workflow is deeply VS Code–centric (or you want fine-grained control), Cursor AI is a serious productivity booster. If “frictionless” is your mantra, Copilot wins for fast adoption.
7. Balancing AI Assistance With Skill Growth
This comes up a lot: will AI code editors make us lose our edge? If you’re just plugging prompts with zero clue how things work, you’ll hit a dead end quickly. But for those who mix AI code generation with practical debugging, reading, and testing skills, productivity soars without atrophy.
Here’s my two cents: the best senior developers blend manual coding with smart AI delegation. It amplifies your capabilities, but doesn’t replace them. Coding is still creative problem solving, you can’t automate your way out of understanding the logic underneath.
You’ll get the most out of Cursor by learning both the tool and your domain. Keep building skills alongside using the AI, and you’ll never feel outpaced by the automation.
8. Beginner Project Walkthrough: Hello World With Cursor AI
If you’ve never touched Cursor before, a lightweight “Hello World” project is the fastest way to see the magic. We’ll use Node.js (but feel free to swap in Python, Go, or anything you prefer):
- Create a folder:
mkdir hello-cursor && cd hello-cursor - Launch Cursor:
cursor .(or open the folder via File → Open…) - Initialize the project: In the integrated terminal, run
npm init -y. - Generate code with AI: Create a blank
index.js, place your cursor inside, hit Command K, and type:
“Write a Node.js script that prints ‘Hello from Cursor AI 🚀’ to the console, then exits.” - Run it:
node index.js— you should see the greeting in your terminal. - Iterate: Ask the agent (Command I) to add a timestamp, colorize the output, or convert to TypeScript. Re-run until you’re happy.
Five minutes in, and you’ve already experienced inline generation, chat-based refactoring, and terminal integration, core workflows you’ll reuse every day.
9. Essential Keyboard Shortcuts Cheat Sheet
Muscle memory beats menu-digging. Tape these to your monitor:
| Shortcut | Action |
|---|---|
| Command / Ctrl K | Inline code generation / quick edits |
| Command / Ctrl I | Open chat agent on selection / file |
| Command Shift P | Command palette (search every command) |
| Command Shift . | Toggle auto run mode on/off |
| Command Shift E | Explorer view (navigate files fast) |
| Command B | Toggle sidebar (extra focus) |
| Tab → Tab | Accept + cycle autocomplete suggestions |
| F8 | Jump to next error |
Learn these, and Cursor feels less like an app, more like an “extra limb” on your keyboard.
10. Troubleshooting and Common Gotchas
- Model exhaustion: Hitting request-limit errors? Switch to the built-in model or add your own API key under Settings → Models.
- Context too large: If responses truncate, shrink your prompt or deselect huge files. The status bar shows token usage.
- Privacy worries: Disable “Share anonymous usage” in Settings and keep proprietary code on-prem if policy demands it.
- Auto run loops: An infinite test loop can happen if the agent keeps failing the same check. Pause auto run, debug manually, then resume.
- Terminal not detected: On first run, enable Shell Integration in Settings. For zsh, Cursor adds a helper line to
~/.zshrc.
11. Additional Learning Resources and Community
- Official Cursor Docs – exhaustive feature list and advanced config tips.
- Cursor Discord – real-time Q&A, show-and-tell, and beta announcements.
- Example projects repo – community-contributed starters in React, Next.js, Django, Rust, and more.
- YouTube channel – bite-sized tutorials, deep dives, and recorded livestreams.
- Live Office Hours: Check the Discord events calendar for weekly “Ask an Engineer” sessions.
Conclusion: Maximizing Developer Efficiency With Cursor AI
Here’s the bottom line: Cursor AI is not just another autocomplete tool. From auto run mode to smart chat features, log-based debugging, and customizable AI rules, it tackles every developer’s most time-consuming chores while sharpening analysis and testing workflows.
Try each feature: let Agent handle your next batch of TypeScript errors, build test suites in minutes, or rewrite stubborn functions by chatting. The more you get familiar with what works in Cursor AI, the more seamless your experience will feel. If you’re only using the autocomplete, you’re skimming the surface.
The future will belong to developers using AI to elevate, not replace, core skills. Use Cursor AI to untangle tricky problems, automate the routine, and free your mind for the genuinely tough puzzles. More productivity, less busywork: that’s a workflow worth adopting.
Curious? Go give Cursor a test spin, you might just find your new second brain.